Types Of Push Notifications
Trophy supports 4 types of push notifications, each of which is designed to suit a common scenario in building gamification experiences. All push notifications are optional, but all four can be used simultaneously and can be controlled from the Push Notifications page in the Trophy dashboard.- Achievement notifications are sent to users each time they unlock an Achievement.
- Recap notifications are sent to users on a pre-defined frequency to summarize progress. Recap notifications can be configured to be sent daily, weekly, monthly or yearly depending on your use case.
- Reactivation notifications are sent to users after they become inactive with the goal of bringing them back to your app.
- Streak notifications are automatically sent to users reminding them to extend their Streak.
Supported Channels
Trophy supports sending push notifications using 3 channels which can all be configured on the Channels page of the Trophy dashboard.Apple Push Notification Service (APNs)
Trophy supports sending push notifications to users via APNs through a certificate-based connection. To send push notifications using APNs, you’ll need to provide Trophy with the following credentials from your Apple Developer Account:- APN Signing Key: Trophy uses this to securely send notifications via APNs
- Team ID: The team ID of your Apple Developer Account
- Key ID: The ID of your APNs authentication key
- Bundle ID: Your app’s unique bundle identifier
For more information on how to configure certificate-based connection to APNs
from a third-party service, read the official setup
guide.
Firebase Cloud Messaging (FCM)
Trophy supports sending push notifications to users via FCM. To achieve this you’ll need to provide Trophy with your Firebase Service Account JSON in the following format:FCM Service Account JSON
For more information on Firebase service accounts and how to authenticate
external services to use FCM, read the official service accounts
guide.
Expo Push Service
Trophy supports sending push notifications to users via Expo Push Service. Expo Push Service saves you having to integrate with FCM and APNs individually and automatically directs notifications through the relevant service based on your users platform. To achieve this you must provide Trophy with a few key details from your Expo account:- Expo Project Name: The name of your Expo project
- Expo Push Token: Your authentication token for sending notifications via Expo (required if using enhanced security).
For more information on Expo Push Service and how to authenticate external
providers, see the official
guide.
Sending Push Notifications
Follow the steps below to start sending push notifications using Trophy.Set up channels
Trophy support sending push notifications via 3 channels, Apple Push Notification Service (APNs), Firebase Cloud Messaging (FCM) or Expo Push Service.Head into the channels page of the Trophy dashboard and configure your preferred channel by following the dedicated guides above.
Add templates
Trophy provides a default template for each type of push notification that Trophy supports.On the configure page, each notification type has its own section. Add templates under the relevant type.Follow the guide on designing push notifications to learn more.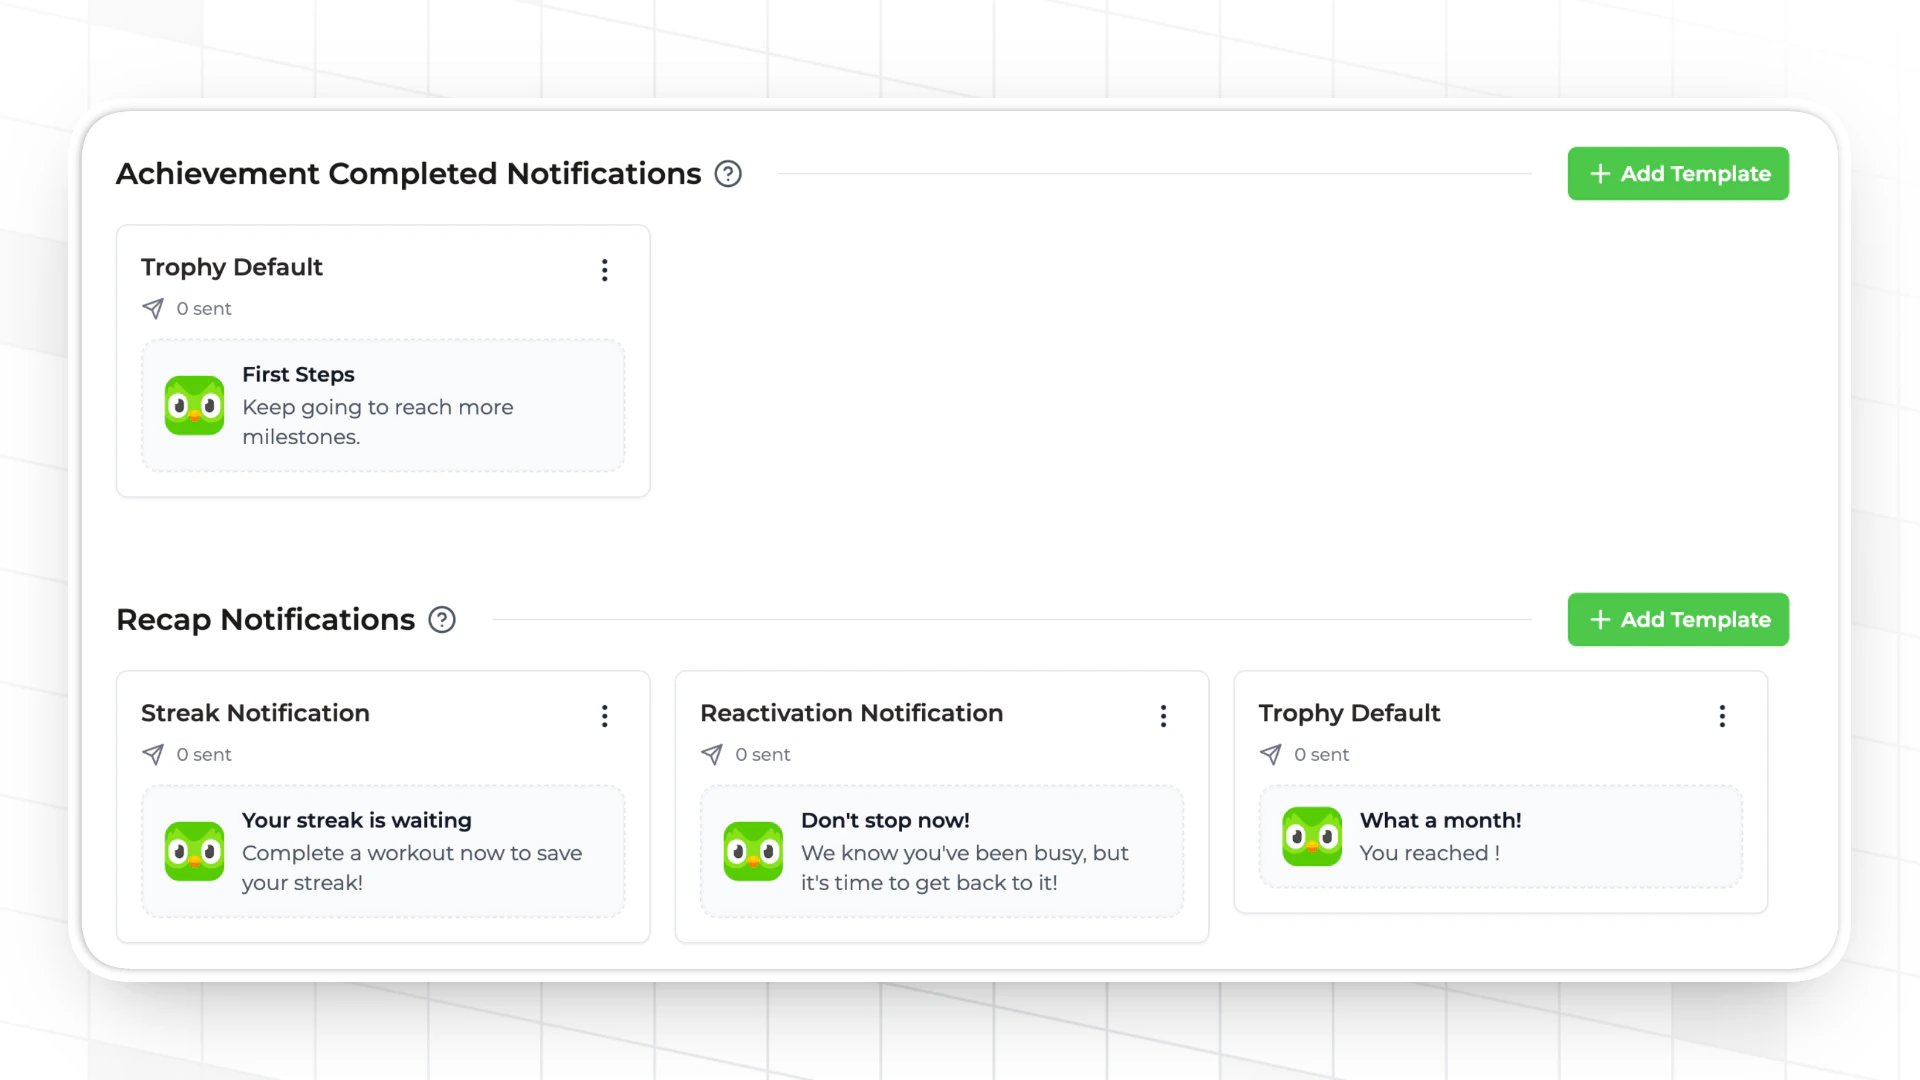
Associate device tokens
To send notifications to users, Trophy needs to know the unique tokens assigned to their devices. You tell Trophy about devices by associating device tokens with each user you identify.Trophy will use the device tokens you associate with each user when communicating with supported push notification channels to route notifications to the correct device.To associate a device token with a user in Trophy, either assign And here’s how to associate device tokens when sending metric events:
deviceTokens when identifying users explicitly, or when sending metric events.Here’s how to associated device tokens when identifying users:Activate templates
The last step is to activate a template within each type of push notification section that you want to send.On the configure page, activate one template in each type section you want to enable. Once activated, Trophy will start sending push notifications automatically.
Designing Push Notifications
By default, Trophy provides a template for each type of push notification as a good starting point. The default templates can’t be changed, but you can duplicate and customize these as you wish.Template Structure
Each push notification has a title and body, and Trophy’s no-code push notification template editor allows you to fully customize both fields.
Using Variables
Trophy provides an expansive set of variables that can be used to insert highly relevant and personalized data into your push notifications. Variables can be inserted by typing@ in the title or body of any push notification, and searching for your chosen variable.
This will open up the variable editor window where you can configure variables as in the demo below. You can also test different variable values and how your template behaves in different scenarios by using the preview sidebar.